


October 8, 2021
Google Drive on Mac – Everything You Need to Know
This guide will take you through everything you need to know about how to use Google Drive on a Mac. We have an in-depth look at how to download, install, and set up the Google Drive application called “Backup and Sync” from Google.
This guide will also show you how to pause and resume syncing and how to disconnect your Google Account from a Mac.
Lastly, we’ll go through the process of uninstalling Google Drive from your Mac.
Why Use the Google Drive App on Mac?
The Google Drive desktop application allows you to access, upload, and download files between your Mac and Google Drive. You can select which specific folders on your mac to sync and share files with other users or clients.
Doing so, you can free up storage space on your Mac. We also found that it speeds up our workflow drastically as the interface is intuitive and easy to use.
Mac System Requirements for Google Drive
The following system requirements are needed to run Google Drive on your Mac:
Browser
An up to date version of one of the following web browsers:
Mac Operating System
We recommend using an up-to-date operating system to download and install Google Drive on your Mac. An updated operating system will ensure that you have no problems syncing to Google Drive. Make sure you have one of the following Mac operating systems installed:
- El Capitan (10.11)
- Sierra (10.12)
- High Sierra (10.13)
- Mojave (10.14)
- and Catalina (10.15)
Click here to find out what operating system your Mac is using.
Create a Google Account
Before downloading and installing Google Drive on your Mac, you need to have or create a Google account. This account will allow you to start using Google Drive on your favorite web browser.
Don’t have a Google account? Follow the easy steps below to create an account:
1. Navigate to google.com/drive and click on “Go to Drive” indicated with the red box.

2. The next window will allow you to select an existing account, if you have one, or create a new one. If you don’t have one yet, click on “Use another account.”

3. Click on the “Create Account” button and choose between the “For myself” or “To manage my business” options.

4. Complete the form in the next window to create your Google Account.

Download Google Drive on your Mac
Note: The App Store only offers Google Drive for iPhone and iPad users.
Once you have created and logged into your Google Account, you can start the process to download Google Drive onto your Mac.
1. Navigate to google.com/drive and click on the “Go to drive” button indicated by the red box.

2. Your Google Drive application window will open up. Click on the gear icon in the top right-hand corner.

3. Then select “Get Drive for Desktop”.

4. On the Download page, scroll down until you reach the “For individuals” section and click on the “Download” button.

5. Click on the blue “Agree and Download” button in the pop-up window confirming the Download Backup and Sync for Mac.

6. The download of the InstallBackupAndSync.dmg file will commence.
Install Google Drive on Your Mac
Once you have downloaded the InstallBackupAndSync.dmg file, you can install Google Drive on your Mac.
1. Navigate to the “Downloads” folder in “Finder” and locate the InstallBackupAndSync.dmg file. Double-click on the file to start the installation process.

2. Drag the “Backup and Sync from Google” icon to the right and drop it in the “Applications” folder.

3. That concludes the installation of Google Drive on your Mac. To locate the application, navigate to the Applications folder in Finder and look for Backup and Sync from Google.

Set Up Google Drive
Now that you have Google Drive downloaded and installed on your Mac, you can add a Google Drive folder to Finder. This section will take you through the steps required to do so.
1. Navigate to the Backup and Sync from Google application in the Applications folder and double-click on it.

2. Click on the Open button in the warning window.

3. The Backup and Sync from Google application opens. Click on Get Started.

4. Enter your Google Account email address and hit next. If you don’t have one yet, create one using the steps laid out in the Create a Google Account section of this article.

5. Enter the password associate with the same Google Account and click on Sign In. Select the Stay signed in option.

6. A pop-up window lets you know that you can continuously sync specific folders with Google Drive. Select the Got It button.

7. Choose the folders (if any) that you want to continuously backup to Google Drive.

8. There are three buttons on the window that will allow you to customize the continuous sync. These are Choose Folder, Change (next to Backing up all files and folders), and Network settings.
8.1. Choose Folder will open a finder window. You can select or create a specific folder that you want to backup.

8.2. The Change button will enable you to switch between backing up all files in these folders to only photos and videos.

8.3. Network Settings will allow you to throttle the upload and download speeds.

9. We created a Desktop folder called Continuously Sync This Folder as an example. Click on Next when you’re happy with the selections.

10. Now select if you want Google Drive to sync with your Mac. You can also choose specific folders Google Drive folders to sync. Click on Start.

11. Now Google Drive is set up and ready to use on your Mac.
The Continuous Synced Folder
During the Google Drive setup, we created a folder on the Desktop to continuously sync with Google Drive. Files loaded into Continuously Sync This Folder is automatically transferred to Drive. In this section, we’ll show you how to upload files in the sync folder and where to locate them in the Drive.
1. In this example, we’ll drag and drop the screenshot file into Continuously Sync This Folder.

2. The Google Drive icon in the menu bar will spin, which indicates that the file is uploading.

3. Navigate to https://drive.google.com/drive/my-drive in any browser. Click on Computers in the left sidebar.

4. Select the applicable computer under the Computers tab. The uploaded file will now be inside Continuously Sync This Folder.

The Google Drive Folder in Finder
After installation, a dedicated Google Drive folder will be created in your Mac’s Finder window. This folder will contain all the files you have on your Drive. From here, you can upload or download any files to and from your Mac.
1. Open a new Finder window and click on the Google Drive folder in the left-hand sidebar.

2. These are all the files and folders that are currently on the Drive. Drag and drop your desired file into the folder to upload to Google Drive.

3. Navigate to Google Drive in your favorite browser where you can see that the file has been successfully uploaded.

Google Drive File Stream
Google Drive File Stream is a file-sharing application similar to Backup and Sync from Google. The main difference is that Drive File Stream is aimed at organizations that make use of shared drives. You cannot download and use Drive File Stream with your personal Google Account.
For a full comparison of the two applications, please find more information here.
Stop Google Drive Sync
There are two ways to stop syncing Google Drive with your Mac. The first is to completely disconnect your Google Account from the Backup and Sync application. The second method is to temporarily pause Backup and Sync. Using this method, you can quickly resume the service when you want to commence syncing again.
Disconnect Google Account from Backup and Sync
1. Click on the Backup and Sync icon in the top Menu Bar

2. Click on the 3 dots for more options and select Preferences.
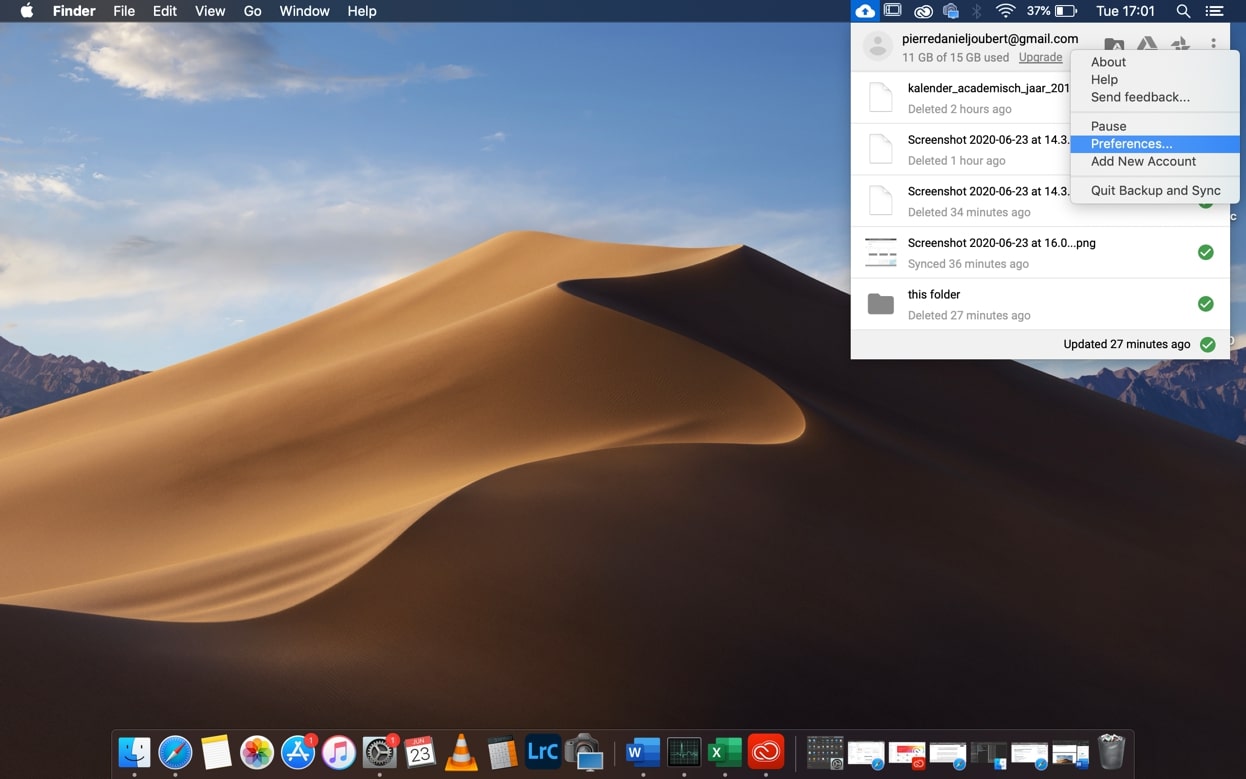
3. Select Settings in the left-hand sidebar and click on Disconnect Account.

4. Click on Disconnect in the next window to confirm.

Your Google Account has now been disconnected from Backup and Sync on your Mac. No automatic file uploads will occur. You can make use of your favorite browser to gain access to Google Drive.
Pause Backup and Sync
1. Click on the Backup and Sync icon in the top Menu Bar.

2. Click on the 3 dots for more options then select Pause.

The automatic sync of files to and from your Mac with Google Drive is now paused. Follow the same steps as described above to Resume the syncing of files.
Uninstall Google Drive on Your Mac
This section will show you how to uninstall the Google Drive application (Backup and Sync) from your Mac. Note that all files on your drive can still be accessed via your favorite web browser at https://drive.google.com.
1. Open a new Finder window and click on Applications in the right pane.
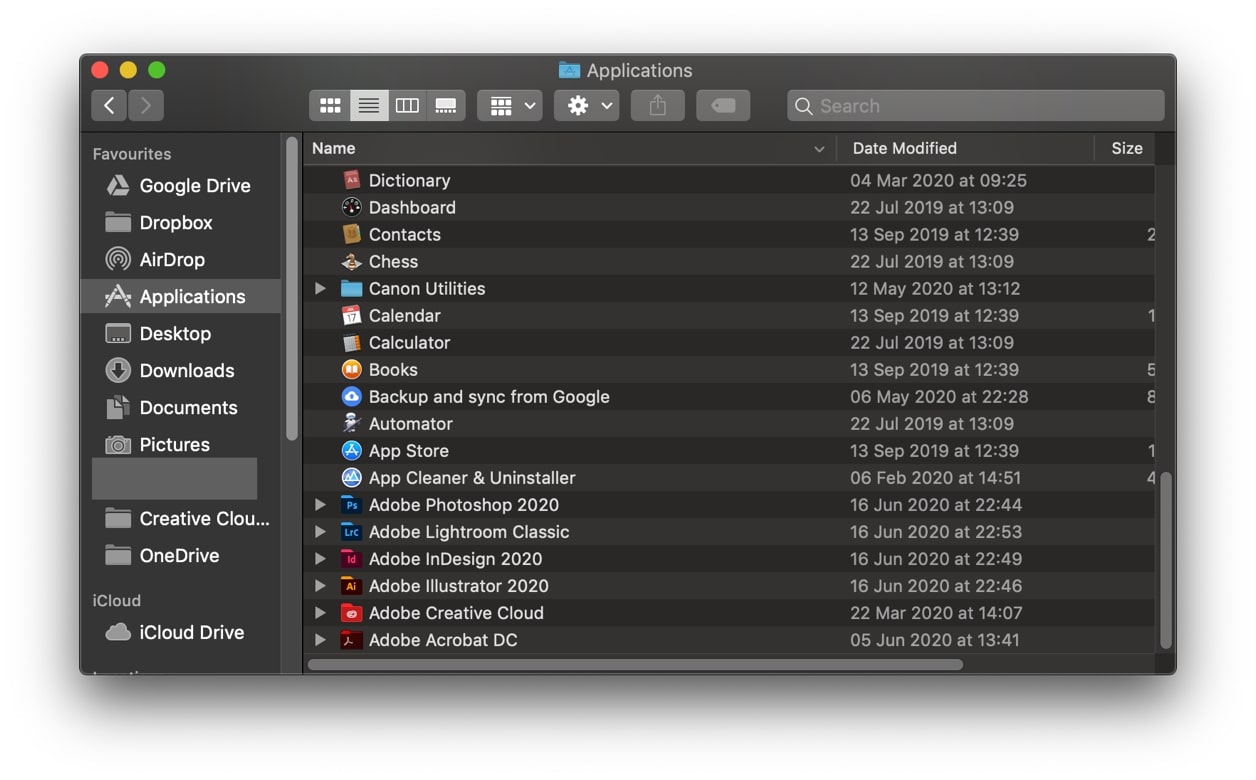
2. Locate the Backup and Sync from Google application. Right-click on it and select Move to Trash.

3. Right-click on the Trash icon on the dock and select Empty Trash.

Conclusion
With so many Google Drive users out there, the desktop application for your Mac takes it one step further. It integrates this powerful, yet simple online drive, with your Mac in such a way that it works intuitively and seamlessly - saving you time and keeping your Mac working at optimum performance.
It’s easy to set up the application on your Mac, and just as importantly, it’s easy to remove.
Written by Pierre Joubert.
Pierre is a qualified electrical engineer, photographer, and web developer. He has a wealth of knowledge on Macs and related software for the creative and technical industries. Join him on Instagram!
Software Expert